Bootstrap Popover Button
Overview
The versions
Bootstrap is one of the most free and useful open-source platforms to develop websites. The latest version of the Bootstrap platform is known as the Bootstrap 4.
Usefulness of the Bootstrap 4
With Bootstrap 4 you can generate your web site now a lot faster than ever. It is comparatively very simpler to utilize Bootstrap to design your web site than some other systems. With the integration of HTML, CSS, and JS framework it is just one of the most well-known systems for website improvement.
Several functions plus tricks in Bootstrap 4
Some of the most recommended features of the Bootstrap 4 incorporate:
• An improved grid system that makes it possible for the user to get mobile device helpful sites using a fair level of comfort.
• Several utility guidance sets have been incorporated in the Bootstrap 4 to facilitate very easy studying for novices in the field of web site building.
Facts to take note
Step 2: Rewrite your article by highlighting words and phrases.
Along with the launch of the brand new Bootstrap 4, the connections to the older variation, Bootstrap 3 have not been entirely removed. The creators have ensured that the Bootstrap 3 does get periodic improve and error repair alongside renovations. It will be performed even after the ultimate launch of the Bootstrap 4. Bootstrap 3 have not been entirely cut off. The developers have ensured that the Bootstrap 3 does get regular improve and bug fixes along with improvements.
Contrasts between Bootstrap 4 and Bootstrap 3
• The support for different browsers including running systems has been incorporated in the Bootstrap 4
• The overall scale of the font is increased for convenient reading and web site development experience
• The renaming of many elements has been performed to ensure a faster and more reliable website development method
• Together with new modifications, it is attainable to generate a much more active internet site along with minimal efforts
Bootstrap Popover Options
And right now let us come to the essential theme.
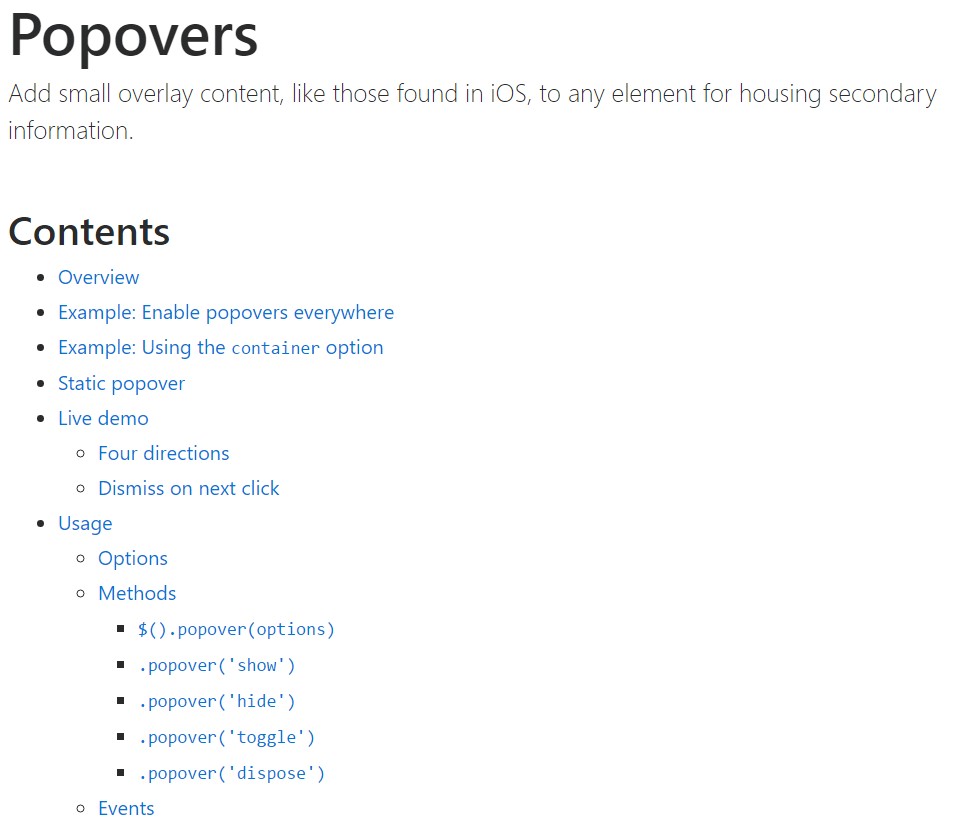
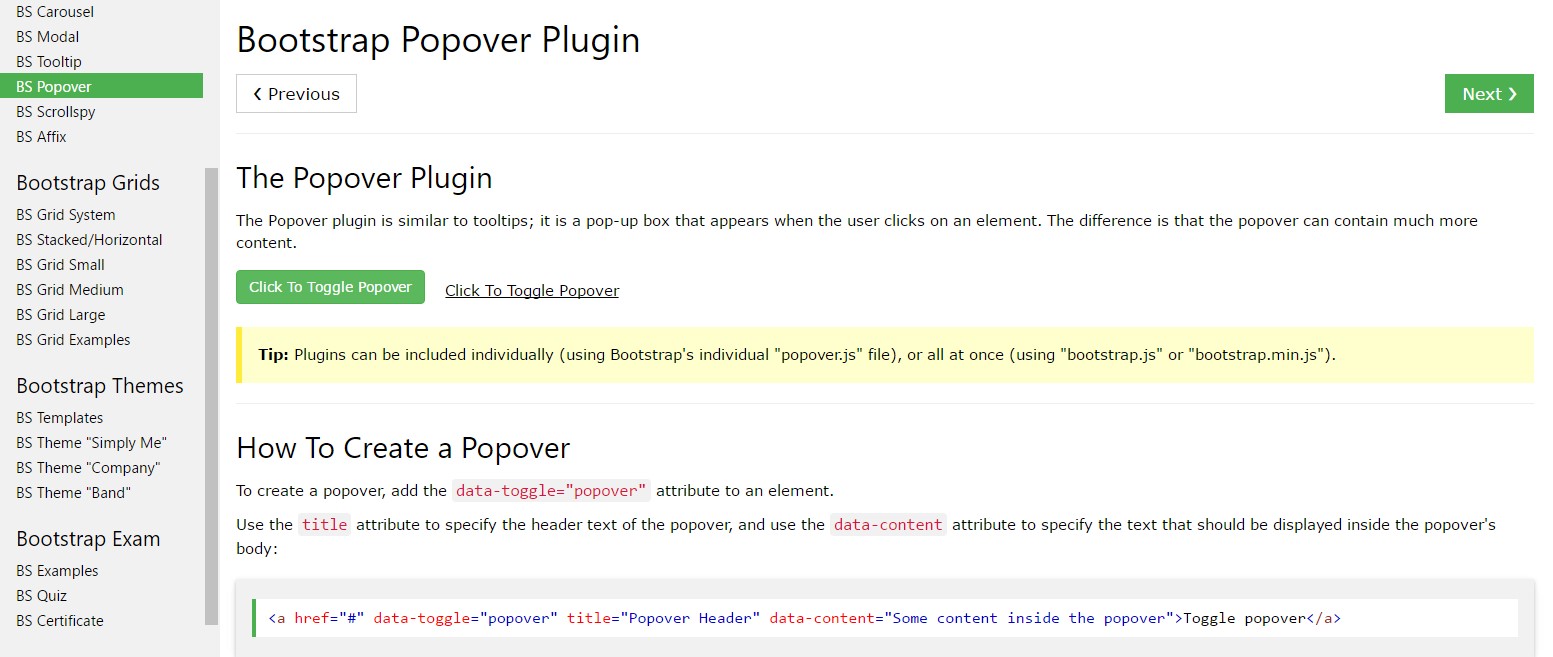
When you wish to bring in some supporting information on your web site you may employ popovers - simply just incorporate compact overlay content.
The way to use the popover plugin:
- Bootstrap Popover Button depend on the Third side library Tether for positioning. You need to incorporate tether.min.js before bootstrap.js in order for popovers to do the job!
- Popovers demand the tooltip plugin considering that a dependence .
- Popovers are opt-in for performance factors, so that you have to activate them yourself.
- Zero-length
titlecontent- Establish
container:'body'- Triggering popovers on hidden components will definitely never get the job done.
- Popovers for
. disableddisabledwhite-space: nowrap;<a>Did you understood? Wonderful, let's observe precisely how they perform with some good examples. ( find more)
You have to provide tether.min.js prior to bootstrap.js in order for popovers to operate!
Example: Set up popovers all over
One way to initialize all of the popovers in a web page would be to select them by their
data-toggle$(function ()
$('[data-toggle="popover"]').popover()
)Illustration: Applying the container possibility
Whenever you obtain some designs on a parent component that conflict with a popover, you'll prefer to determine a custom-made
container$(function ()
$('.example-popover').popover(
container: 'body'
)
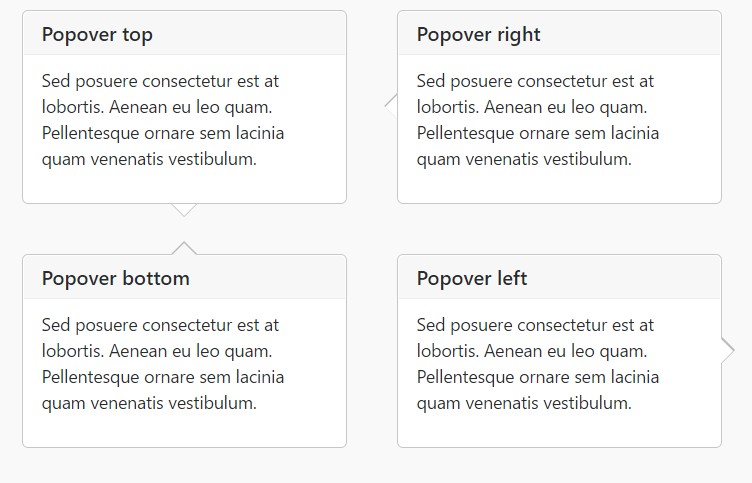
)Static popover
Four possibilities are offered: high point, right, lowest part, and left adjusted.
Live demo
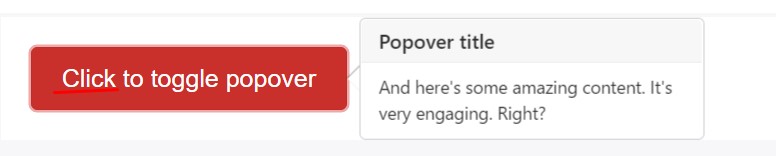
<button type="button" class="btn btn-lg btn-danger" data-toggle="popover" title="Popover title" data-content="And here's some amazing content. It's very engaging. Right?">Click to toggle popover</button>Four ways
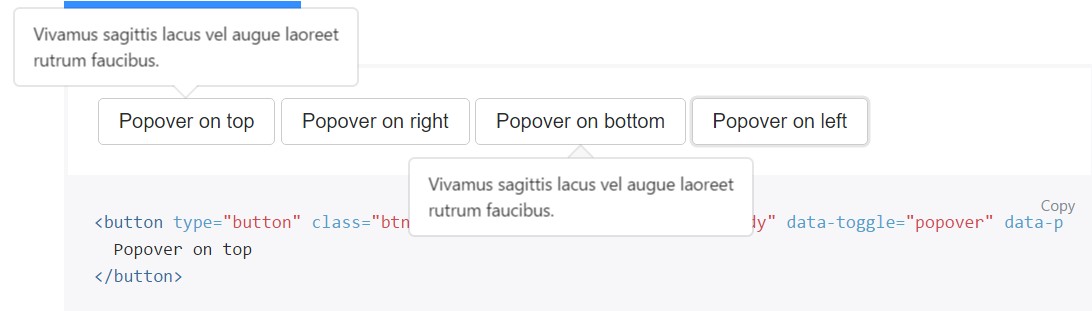
<button type="button" class="btn btn-secondary" data-container="body" data-toggle="popover" data-placement="top" data-content="Vivamus sagittis lacus vel augue laoreet rutrum faucibus.">
  Popover on top
</button>

<button type="button" class="btn btn-secondary" data-container="body" data-toggle="popover" data-placement="right" data-content="Vivamus sagittis lacus vel augue laoreet rutrum faucibus.">
  Popover on right
</button>

<button type="button" class="btn btn-secondary" data-container="body" data-toggle="popover" data-placement="bottom" data-content="Vivamus
sagittis lacus vel augue laoreet rutrum faucibus.">
  Popover on bottom
</button>

<button type="button" class="btn btn-secondary" data-container="body" data-toggle="popover" data-placement="left" data-content="Vivamus sagittis lacus vel augue laoreet rutrum faucibus.">
  Popover on left
</button>
Dismiss upon coming mouse click
Employ the
focusSpecial markup demanded for dismiss-on-next-click
For correct cross-browser and cross-platform behavior, you need to apply the
<a><button>tabindex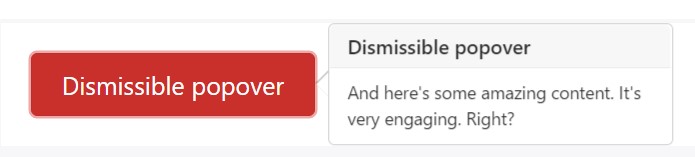
<a tabindex="0" class="btn btn-lg btn-danger" role="button" data-toggle="popover" data-trigger="focus" title="Dismissible popover" data-content="And here's some amazing content. It's very engaging. Right?">Dismissible popover</a>$('.popover-dismiss').popover(
trigger: 'focus'
)Utilising
Empower popovers through JavaScript
$('#example').popover(options)Methods
Selections may possibly be successfully pass by means of data attributes as well as JavaScript. For data attributes, add the option name to
data-data-animation=""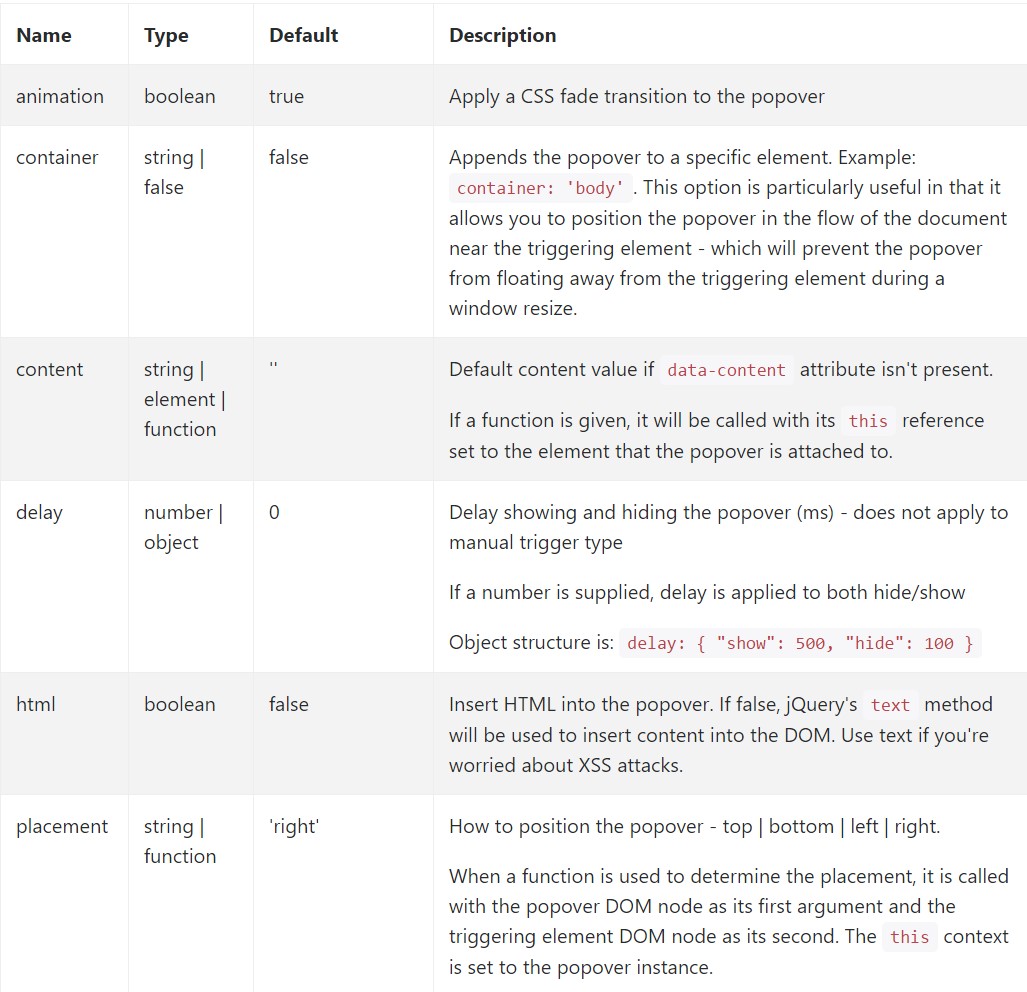
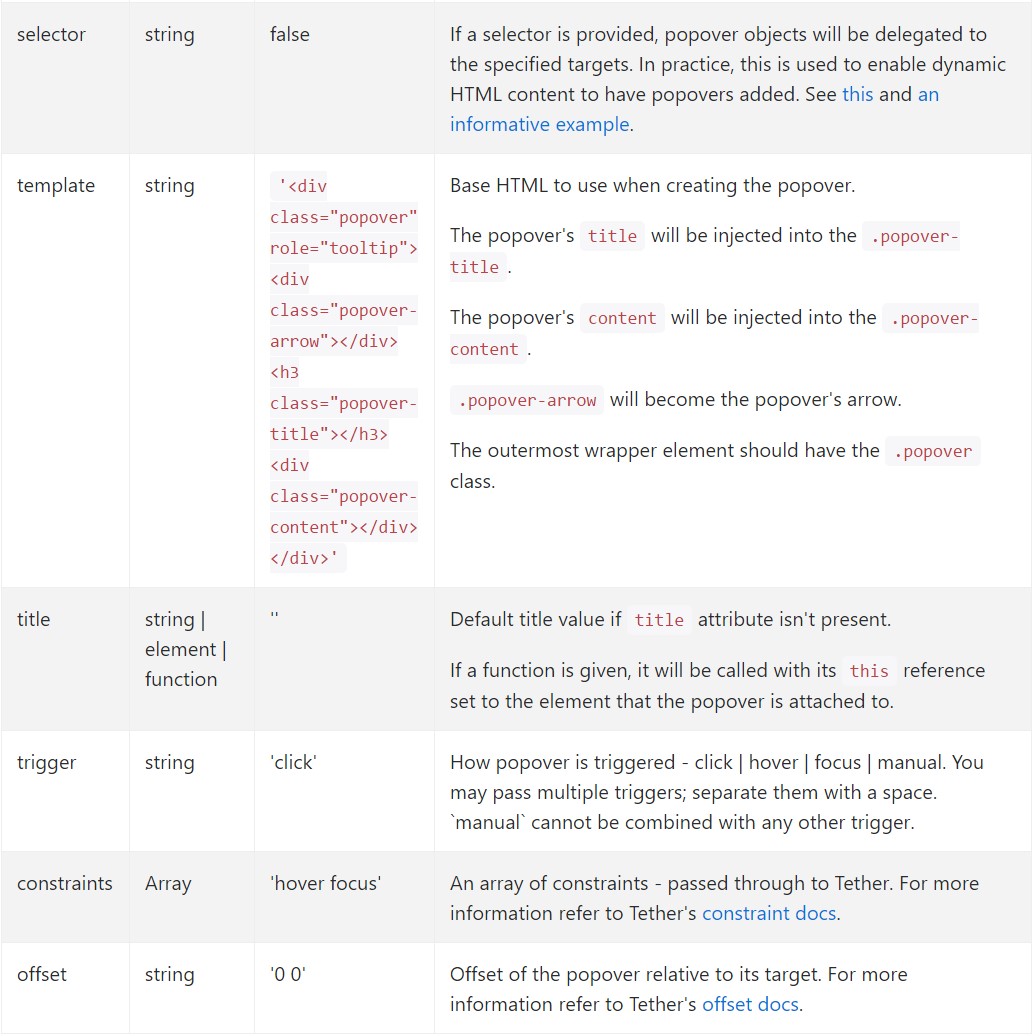
Information attributes for individual popovers
Selections for individual popovers can additionally be pointed out throughout the usage of data attributes, as explained above.
Methods
$().popover(options)
Initializes popovers with regard to the component selection.
.popover('show')
Uncovers an element's popover. Returns to the caller before the popover has really been shown (i.e. before the shown.bs.popover
event occurs). This is regarded as a "manual" triggering of the popover. Popovers whose each title and web content are zero-length are never displayed.
$('#element').popover('show')
.popover('hide')
Disguises an element's popover. Returns to the caller before the popover has truly been covered (i.e. right before the hidden.bs.popover
event takes place). This is regarded a "manual" triggering of the popover.
$('#element').popover('hide')
.popover('toggle')
Button an element's popover. Goes back to the caller right before the popover has in fact been revealed or concealed (i.e. before the shown.bs.popover
or hidden.bs.popover
event occurs). This is taken into consideration a "manual" triggering of the popover.
$('#element').popover('toggle')
.popover('dispose')
Cover and wipes out an element's popover. Popovers which put to use delegation (which are created using the selector feature) can not really be separately eliminated on descendant trigger features.
$('#element').popover('dispose')
Events
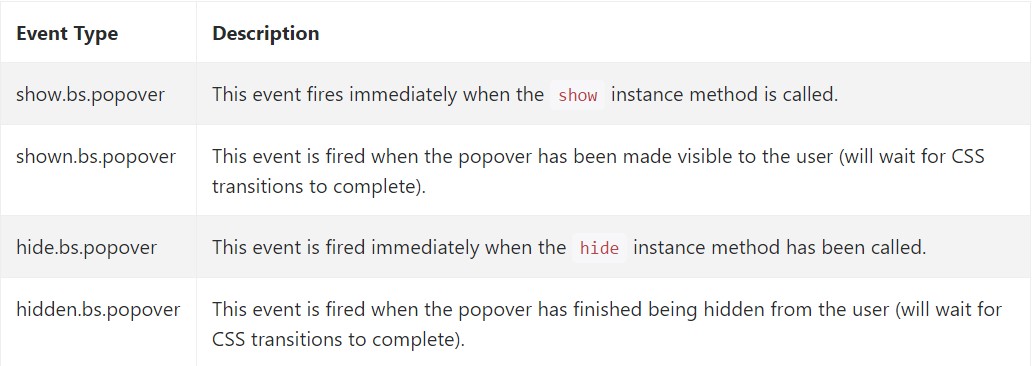
$('#myPopover').on('hidden.bs.popover', function ()
  // do something…
)
Review a number of online video short training relating to Bootstrap popovers
Connected topics:
Bootstrap popovers authoritative documents
Bootstrap popovers tutorial
Bootstrap Popover complication
$().popover(options)
Initializes popovers with regard to the component selection.
$().popover(options).popover('show')
Uncovers an element's popover. Returns to the caller before the popover has really been shown (i.e. before the .popover('show')shown.bs.popover$('#element').popover('show').popover('hide')
Disguises an element's popover. Returns to the caller before the popover has truly been covered (i.e. right before the .popover('hide')hidden.bs.popover$('#element').popover('hide').popover('toggle')
Button an element's popover. Goes back to the caller right before the popover has in fact been revealed or concealed (i.e. before the .popover('toggle')shown.bs.popoverhidden.bs.popover$('#element').popover('toggle').popover('dispose')
Cover and wipes out an element's popover. Popovers which put to use delegation (which are created using the selector feature) can not really be separately eliminated on descendant trigger features.
.popover('dispose')$('#element').popover('dispose')Events
$('#myPopover').on('hidden.bs.popover', function ()
// do something…
)Review a number of online video short training relating to Bootstrap popovers
Connected topics:
Bootstrap popovers authoritative documents
Bootstrap popovers tutorial
Bootstrap Popover complication