Bootstrap Checkbox Label
Overview
From time to time the elementary aspects might probably get extremely critical-- especially once you come to need them. As an example precisely how do your website visitors interact with the web pages you build stating a simple Boolean action-- simply yes or no relating to a couple of the issues you should request, the way they do confirm the conditions and terms or maybe line up a few of the feasible selections they might possess. We usually get past this without paying very much of an attention to the feature responsible for such activities still, the Bootstrap Checkbox Position is actually a quite important element-- one our forms can not in fact perform without.
In the current fourth version of the Bootstrap platform we are provided with the
.form-check.form-check-label<div>.form-check.form-check-label<label><input>.form-check-inputThe ways to apply the Bootstrap checkbox:
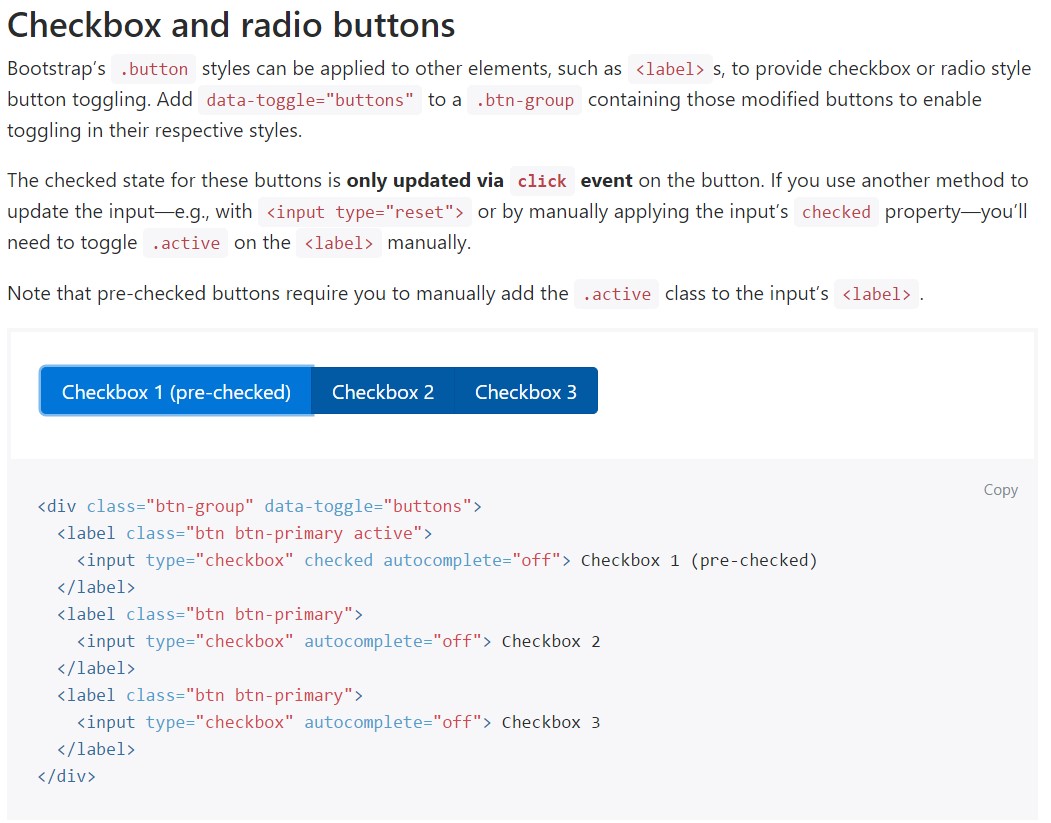
The checked state for these buttons is only updated via click event on the button.

<div class="btn-group" data-toggle="buttons">
  <label class="btn btn-primary active">
    <input type="checkbox" checked autocomplete="off"> Checkbox 1 (pre-checked)
  </label>
  <label class="btn btn-primary">
    <input type="checkbox" autocomplete="off"> Checkbox 2
  </label>
  <label class="btn btn-primary">
    <input type="checkbox" autocomplete="off"> Checkbox 3
  </label>
</div>
In certain cases we require the checkboxes to be within our forms without the site visitor actually can have any action selecting them-- that is definitely where the disabled option comes out.
In order to disable efficiently a checkbox in Bootstrap 4 utilizing the typical HTML attribute
disabledIn the case that you appreciate the suggestion and simply desire to carry this out you need to assign the
.disabled.form-checkSome other case
When utilizing checkboxes, wrap all of them in a
<label>.custom-control.custom-checkboxUse
.custom-control-input<input>As well apply two
<span>.custom-control-indicator.custom-control-description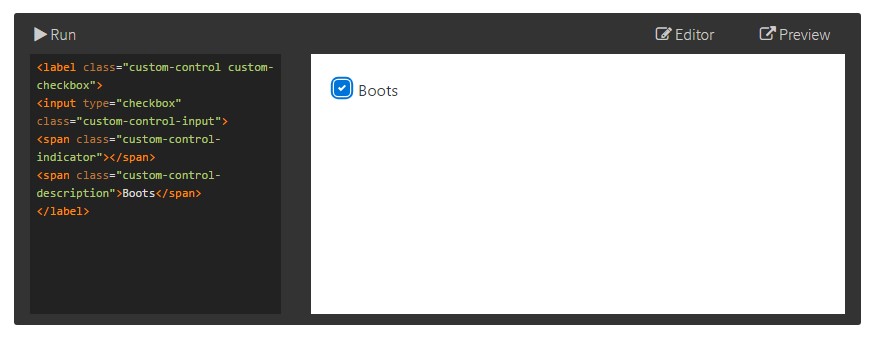
<label class="custom-control custom-checkbox">
<input type="checkbox" class="custom-control-input">
<span class="custom-control-indicator"></span>
<span class="custom-control-description">Boots</span>
</label>
Bootstrap Checkbox Style forms
Default radios and checkboxes are upgraded upon with the support of
.form-checkDisabled checkboxes and radios are supported, still, to deliver a
not-allowed<label>.disabled.form-checkA brand-new element for the Bootstrap version 4 system is the initiation of the so called customized form components. These are actually the similar elements we are knowing in capability though designated far more attractive and with the Bootstrap method. Utilizing them you can certainly provide fascinating taste and charm to your web content with just selecting a few extra classes to the controls you incorporate in your forms.
For you to apply custom checkboxes wrap them within a
<label>.custom-control.custom-checkbox<input>.custom-control-input<span>.custom-control-indicator.custom-control-descriptionConclusions
That's basically all you should complete in order to add a checkbox element in your Bootstrap 4 powered web pages and incorporate certain custom-made flavor to it incorporating it a stylish looks. Now all you ought to do is repeat the drill unless you've reviewed every one of the checkboxes wanted are already on the webpage.
Take a look at a couple of youtube video short training regarding Bootstrap checkbox
Connected topics:
Bootstrap checkbox main records
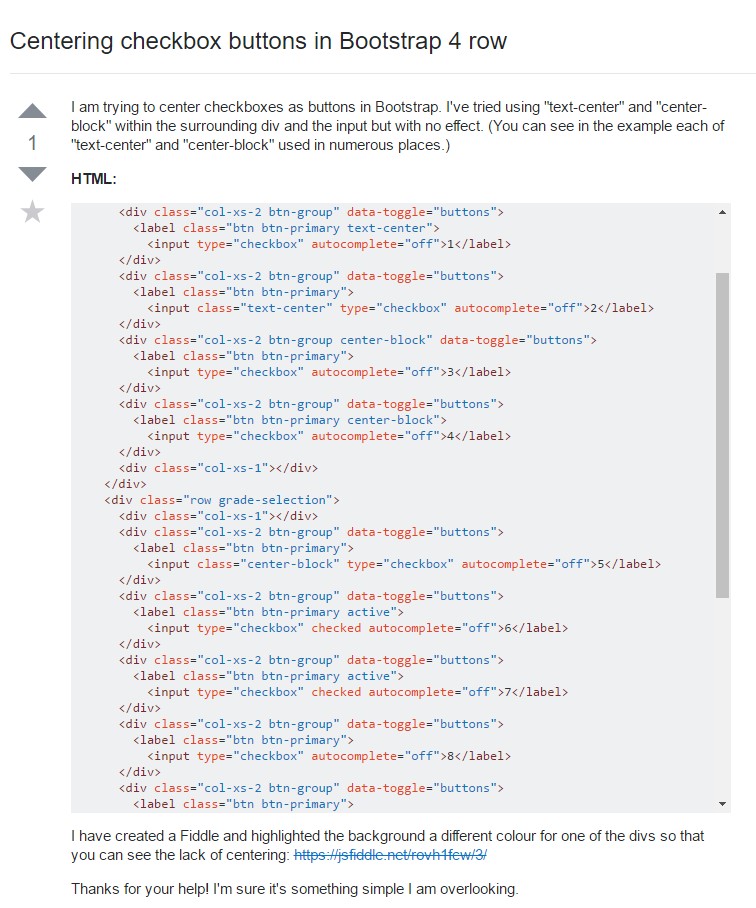
Centering checkbox buttons in Bootstrap 4 row
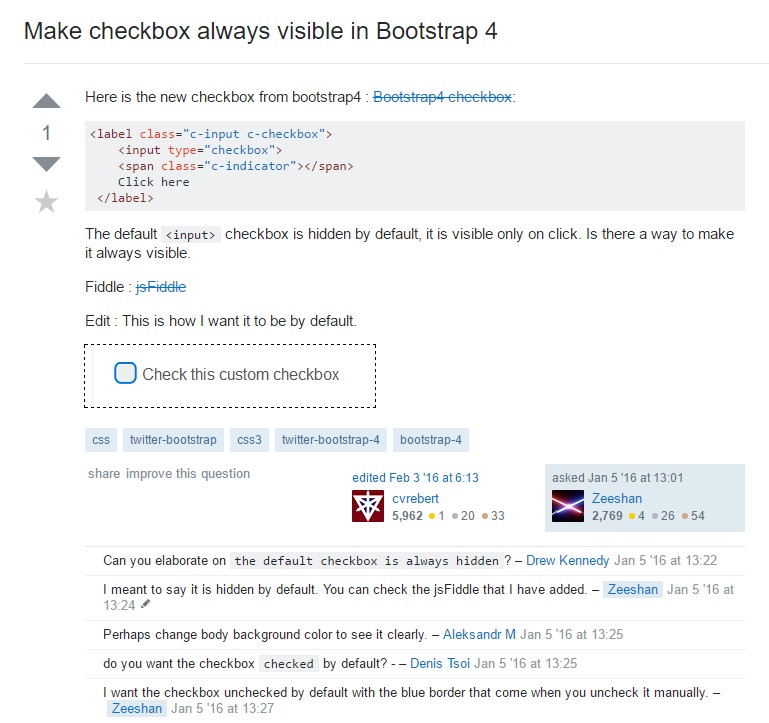
Make checkbox always visible in Bootstrap 4